It’s the most wonderful time of the year - the biggest involve.me update is launching today!
If you’re working in a team or create a lot of interactive content, listen up: 📣 involve.me now enables you to invite team members to work within your master account, create workspacess to clean up your project dashboard and see your project and account settings clearer.
Here’s a quick summary of the new functions we are introducing:
With this update you can:
✔ Invite team members into your organization
✔ Keep your projects organized and in one place across different campaigns, offices or team members
✔ Share company templates with your team members - duplicate a project and move it into their workspace
✔ Invite a client to view their projects and analytics in view only
✔ Manage your team's projects better with assigned workspaces
✔ Easily move projects from one workspace to another
✔ Easily rename or remove workspaces
✔ See your project stats without having to open it
✔ Have your project picture in the project icon to identify the project easier
✔ Color-coded projects based on project status - draft, published, completed and archived
✔ Sort projects ascending or descending by number of submissions, name or creation date
✔ Smart search projects by name within a workspace
✔ Change assigned team member roles at any time (from editor to viewer and vice versa)
✔ Better project settings and account settings view
At involve.me, we use involve.me. A LOT. You can see involve.me projects embedded all over our website and blog, we have emailed them to you, posted them on our social pages and linked to them in our ads.
Every involve.me team member from marketing to finance is creating their own involve.me projects. We have over 500 projects spread across different accounts and 👏 it 👏 was 👏 a 👏 mess.
We knew we had to do something about it, but as a B2B2C business, our priority has always been your users. Your users’ experience with the interactive content you create with involve.me will always top our priority list.
involve.me is a user engagement platform. With better user engagement comes growth. As your team grows, it becomes increasingly more difficult to manage your team’s work.
All of the above is why, starting today, December 19th, as an early whatever-you-celebrate gift and a token of appreciation for sharing our passion for creating interactive content, we give you: workspaces and better account & project settings.
Organize Your Work with Workspaces
Workspaces is an organizational system for your involve.me projects. It allows you to create workspaces for campaigns, clients or team members. Users you invite to collaborate with you have different roles and permissions you can change anytime.
What Can You Use Workspaces For?
1. Keep Your Projects Organized
Whether you’re working in a team or alone but creating a team’s worth of interactive content (kudos to you!) it helps to keep your work segmented in workspaces. That’s what workspaces are.
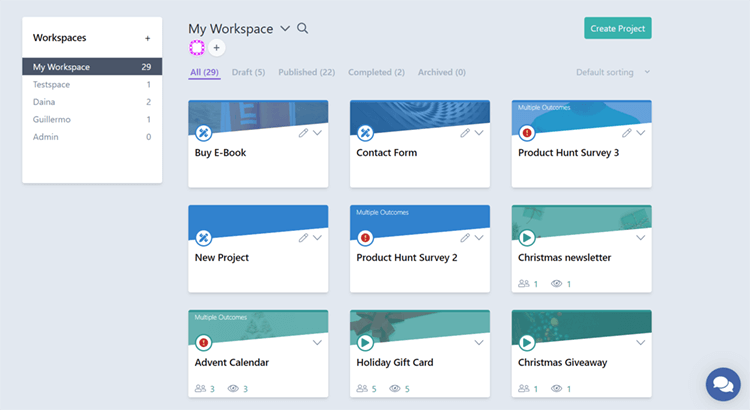
Your account comes with a default workspace and you can add more. Additional workspaces can be created for your campaigns or team members.
2. Invite Team Members into Your Organization
With workspaces, you can keep all your organization’s interactive content in one master account and have multiple team members contributing. Invite team members as editors and let them work in their assigned workspace.
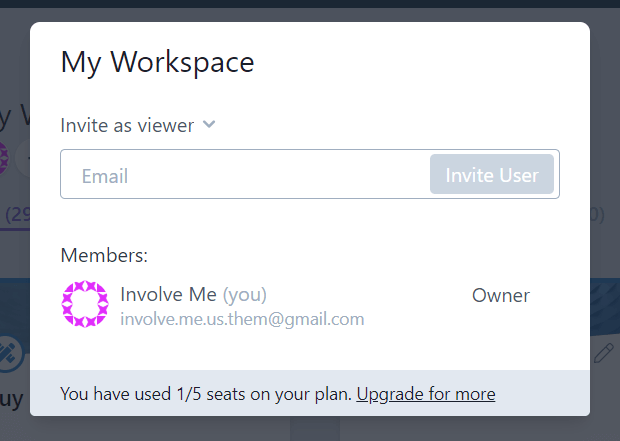
If you want your team members to see your projects, but don’t want them to alter your projects, you can invite them as viewers. This allows them to view the projects, analytics and overall submission and upload limits.
When inviting team members as editors, keep in mind that it’s not possible to edit the same project at the same time. This is to avoid issues with saving your progress and someone else possibly undoing your changes before you have a chance to save them.
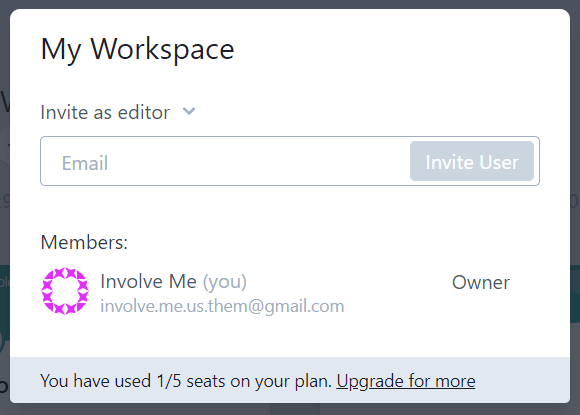
3. Share Company Templates with Your Team Members
Using the “create from scratch” feature or simply by customizing a template to match your brand perfectly, you can create your own branded interactive content kit. But that’s nothing you didn’t know already.
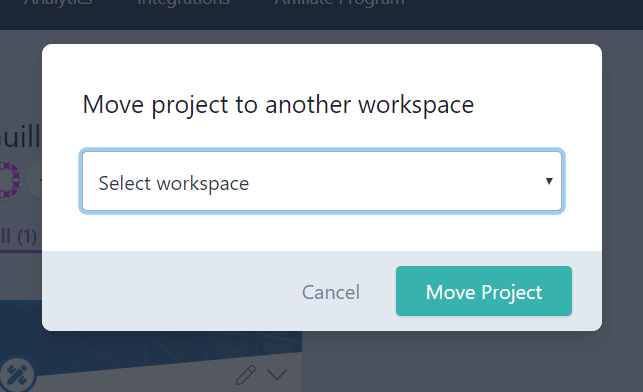
What you can do now with workspaces is duplicating a project and moving it into a team member’s workspace. This way they have access to your company templates without altering your original project or having to replicate it from their account. You can welcome each new team member with a set of their own branded projects to work with.
You can also invite team members you don’t want making changes as viewers. Team members who might need to view projects for making reports can be added as viewers instead of editors.
If you change your mind, you can change team member roles anytime. So everyone better watch what they say about you at the water cooler!
4. Invite a Client to View Their Project
Besides adding team members as editors, you can also invite them as viewers. This role was created for clients you choose to share your stats with. They can see the projects you have created for them and how they are performing in project analytics.
Viewers have real-time access to view projects and project analytics. But as viewers without editing rights, they cannot make any changes, keeping your projects save.
5. Change Assigned Team Member Roles at Any Time
The two roles you can assign to your invited team members are viewer and editor. Here’s a list of what each role can do:
Organization Owner
Manage billing & plans
Manage custom domains
Manage payment platform integrations
Manage organization level integrations
Create and manage workspaces
See cross project submission-tracking
Members with Editing Rights for a Workspace
Create and edit projects in the workspace(s)
Manage project-level integration for projects in the workspace(s)
Change settings for projects in the workspace(s)
Invite users to the workspace(s) they are a member of (affects the overall limit)
Delete projects they created
Move a project to another workspace they are an editor member of
Members with Viewing Rights for a Workspace
See projects in the workspace(s)
See all analytics of projects in the workspace(s)
See the overall submission and storage usage of the organization
Every User
Create own organization
Change account/profile details
Join the affiliate program
Use templates
6. Manage Your Team's Projects Better with Assigned Workspaces
Assign individual workspaces to each team member and let them create interactive content within your organization account. See what everyone is working on, let each team member have their own space to work, and interfere to make changes when you need to.
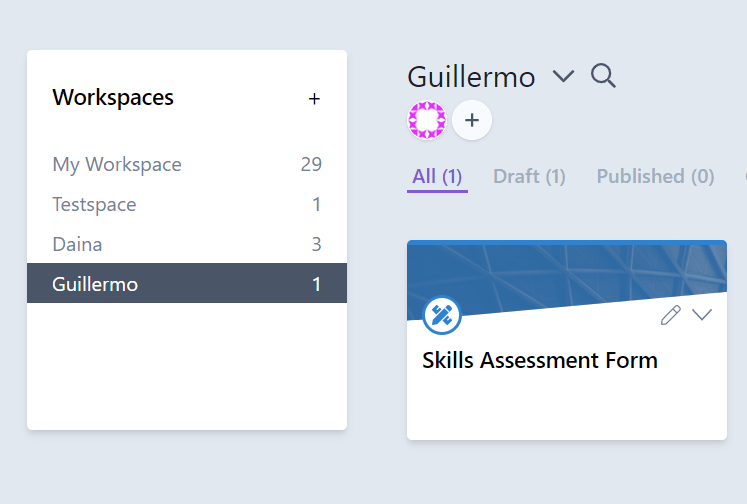
7. Easily Move Projects in Between Workspaces
Create a project for your team in your default workspace and then move it into a team member’s workspace. Or share a copy of your team member’s best performing projects with the rest of the team.
Duplicate your branded projects to use them as your own templates customized for your company’s needs. Create a branded interactive content kit for each team member or even client.
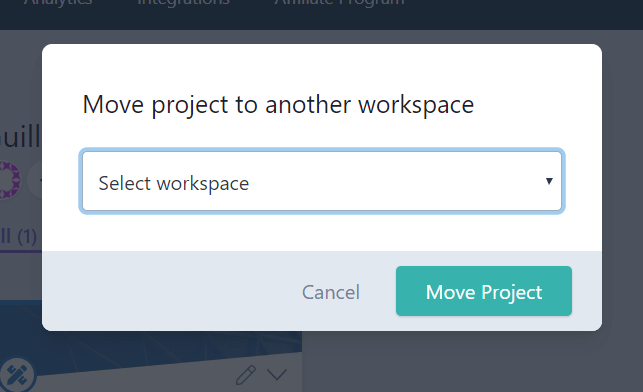
8. See Your Project Stats Without Having to Open It
The more projects you create and publish, the harder it is to keep track of which one is performing best. The new workspace layout displays your projects as cards, which fits in more information.
This way you can see key project stats without going to your project analysis. This makes it easier to compare which project is doing best and what strategies need improvement within your default or team member workspace.
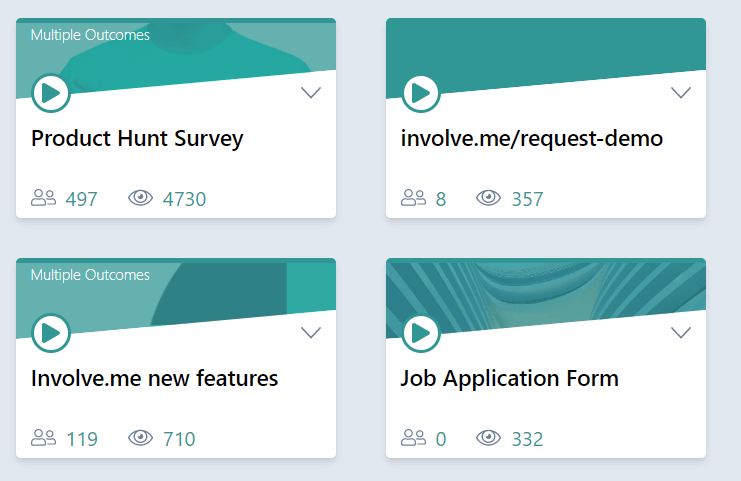
9. Have Your Project Picture in the Project Icon
Looking for that project you spent hours designing a few months back, but can’t for the love the God remember how you named it? As long as you can recognize the project’s background image, you will find it in no time!
The workspace project card layout displays your project’s background image on the project card so you can spot easily. If you’re a fan of plain backgrounds, your project card will be color-coded baes on project status.

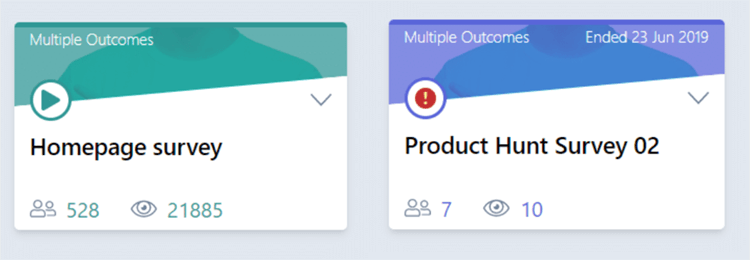
10. Color-coded Projects Based on Project Status
To further organize your projects and stay on top of your campaigns’ status, workspace project cards are now color-coded based on project status. Draft, published, completed and archived projects now have distinct color tags so you can see what’s published and what’s not at a glance.
With just one quick look you can see if Sarah met her deadline and sent out the customer survey yesterday. You can quickly check if people can still join your giveaway or if the campaign has ended.
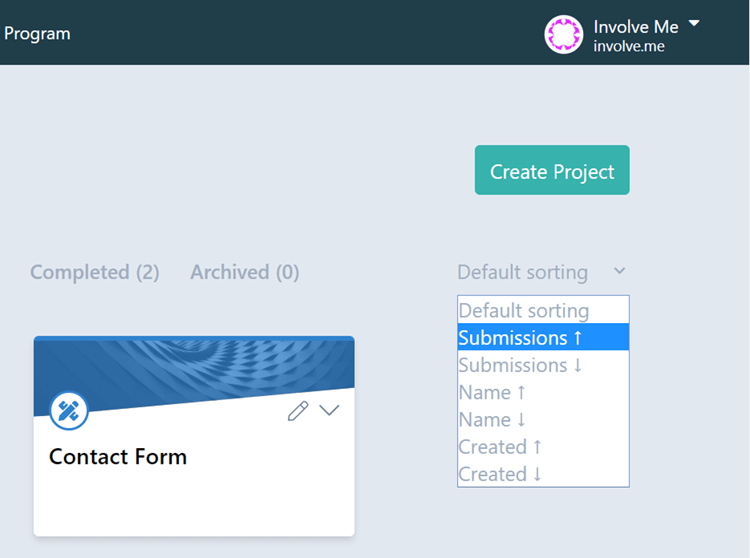
11. Sort Projects by Performance, Name or Creation Date
Wondering what project got the most submissions? Now it takes seconds to find out. Change the sorting in the top right corner from default to submissions ↑, submissions ↓, name ↑, name ↓ or creation date ↑ and creation date ↑.
Identify patterns in your best and worst performing projects, learn from your own, now easily accessible, data and gather more submissions with more engaged users.
12. Smart Search Projects by Name Within a Workspace
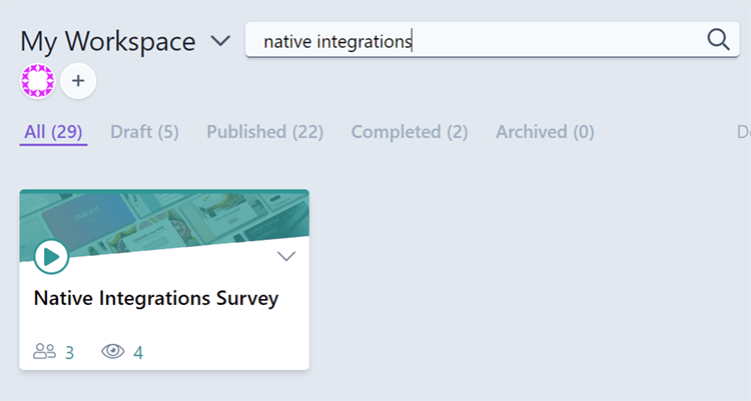
Looking for that lead gen A/B test project you ran a few months back but’s buried in stunning results of your productivity? We are not going to make you scroll down for 5 minutes to find it.
Type in any part of the project’s name you recall and you will find your work in seconds! You can search by name in your default or additional workspaces.
13. Easily Rename or Remove Workspaces
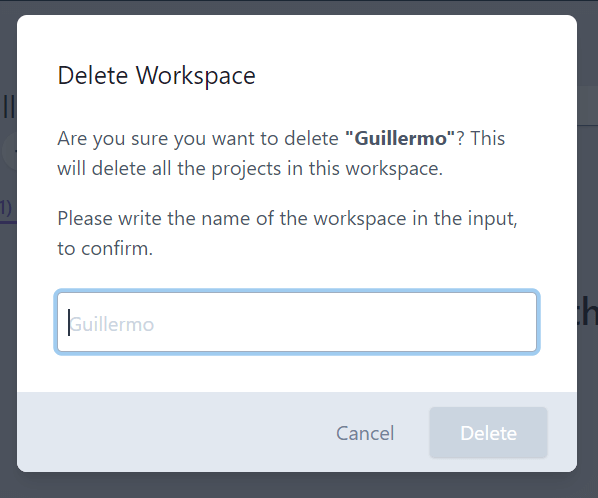
If you don’t like your default workspace’s name, change it! Have it give you a compliment every now and then. Or a motivational quote to boost your productivity. Or foul-mouthed mockery to shame you into meeting your deadlines. Whatever rocks your boat.
As well as adding workspaces, removing them is just as easy. So don’t be shy and create as many as you want.
What’s New in Project Settings
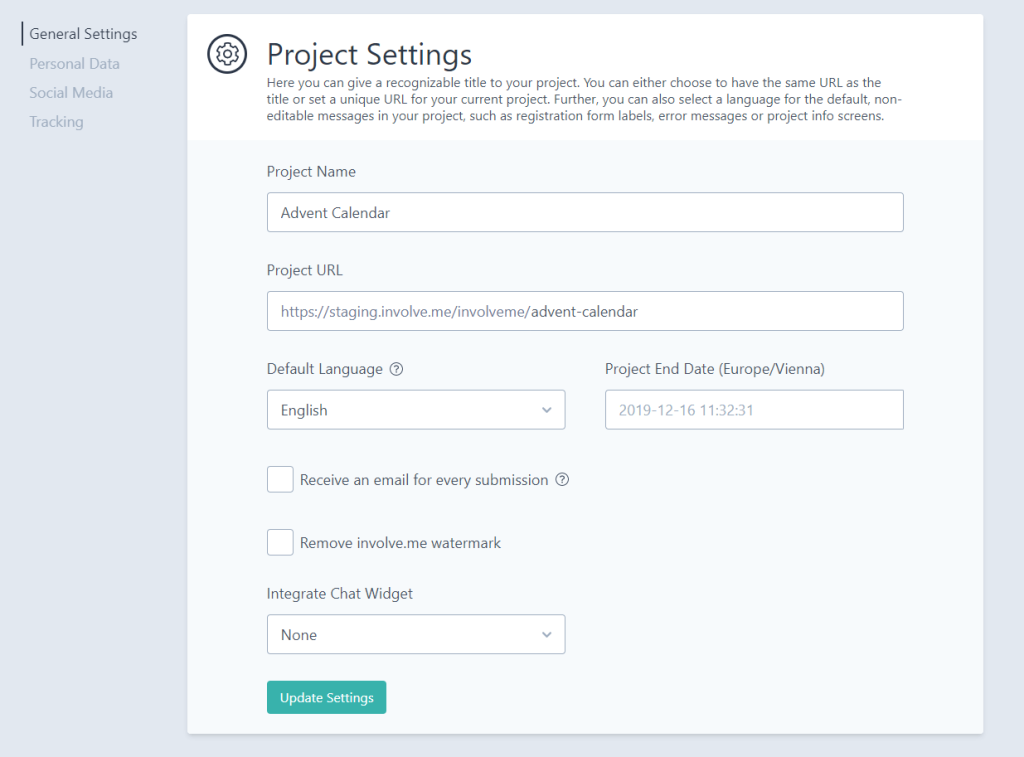
When creating workspaces for you, we didn’t want to leave project settings behind so we gave it a style makeover. Function-wise, everything’s the same. So if you’re a project settings veteran, you can skip this part. But if you need a reminder, have a quick scroll through.
General Settings
When getting ready to publish your project, here’s where to:
Change your project’s name
Customize your project’s URL
Set up email notifications for submissions
Pick an end date for your project
Integrate a chat widget - intercom, gist/convertfox
Be careful when setting up submissions notifications - if you are using them for your clients, we recommend doing that through your email service provider, many of which we natively integrate with. There is nothing wrong with involve.me submission notification emails, but you might want to brand and segment those for your clients first. Or not, your project, your rules.
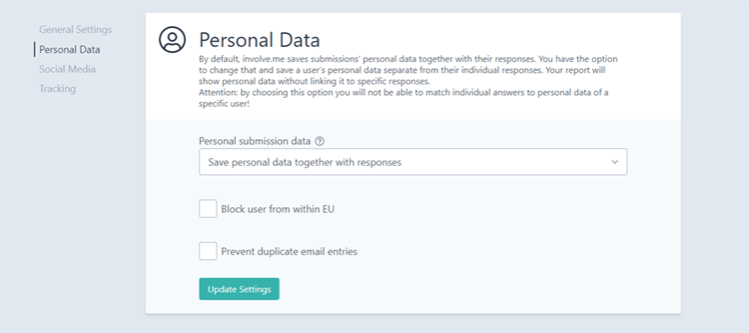
Personal Data Settings
Here is where you can pick whether to disable European Union citizens from submitting (because of GDPR compliance) or prevent users to enter the same email twice and waste a submission if you’re nearing your limit at the end of the month.
Block users from within the EU
Prevent duplicate email entries
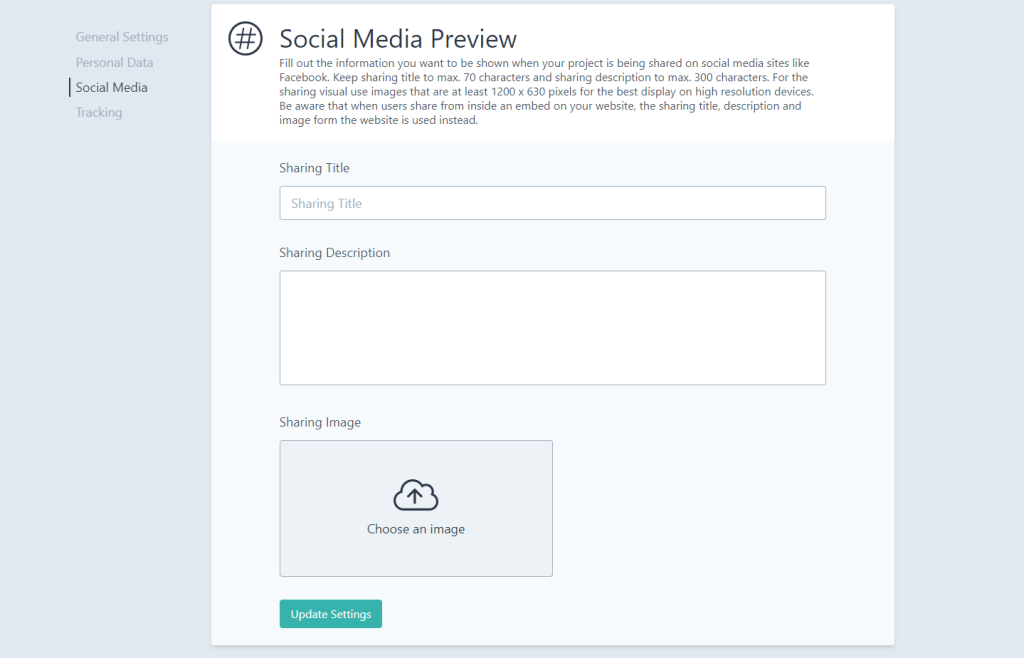
Social Media Preview Settings
You don’t have a change the project itself just to make sure it looks great on social. In Social Media Preview Settings you can change every aspect of how your project shows up in your audience’s feed. You can adjust the following sharing settings:
Sharing Title
Sharing Description
Sharing Image
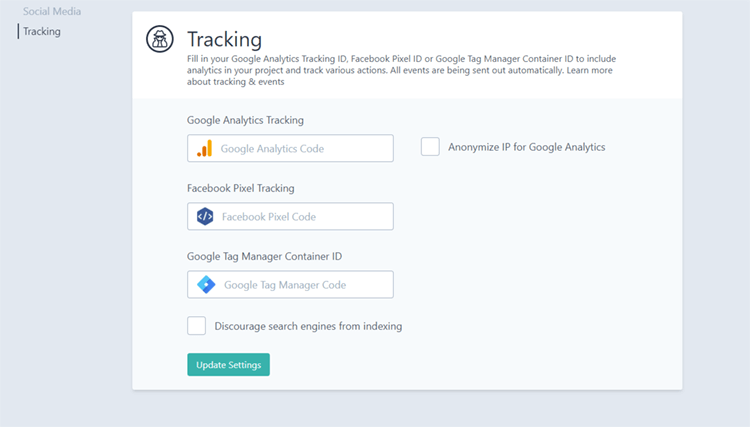
Tracking Settings
You might want to know if your time and/or financial investment is worth it. Insert your Pixel, Google Analytics or Google Tag Manager code here to track various actions for your project.
Facebook Pixel Tracking
Google Analytics Tracking
Google Tag Manager Tracking
Discourage Search Engines from Indexing
Anonymise IP for Google Analytics
What’s New In Your Account
If you were wondering where did your remaining submissions for the month and remaining storage go, click the arrow in the top right corner next to your account name. Now you can see if you’re approaching your submissions and storage limits for the given month without going to your projects first.
In that same dropdown, you can change your organization details or even create a new one.
Your account now also has a profile picture picked from Gravatar!
Did we miss anything? Let us know!
If you need additional information about workspaces, read this detailed help article.


